Email Payment
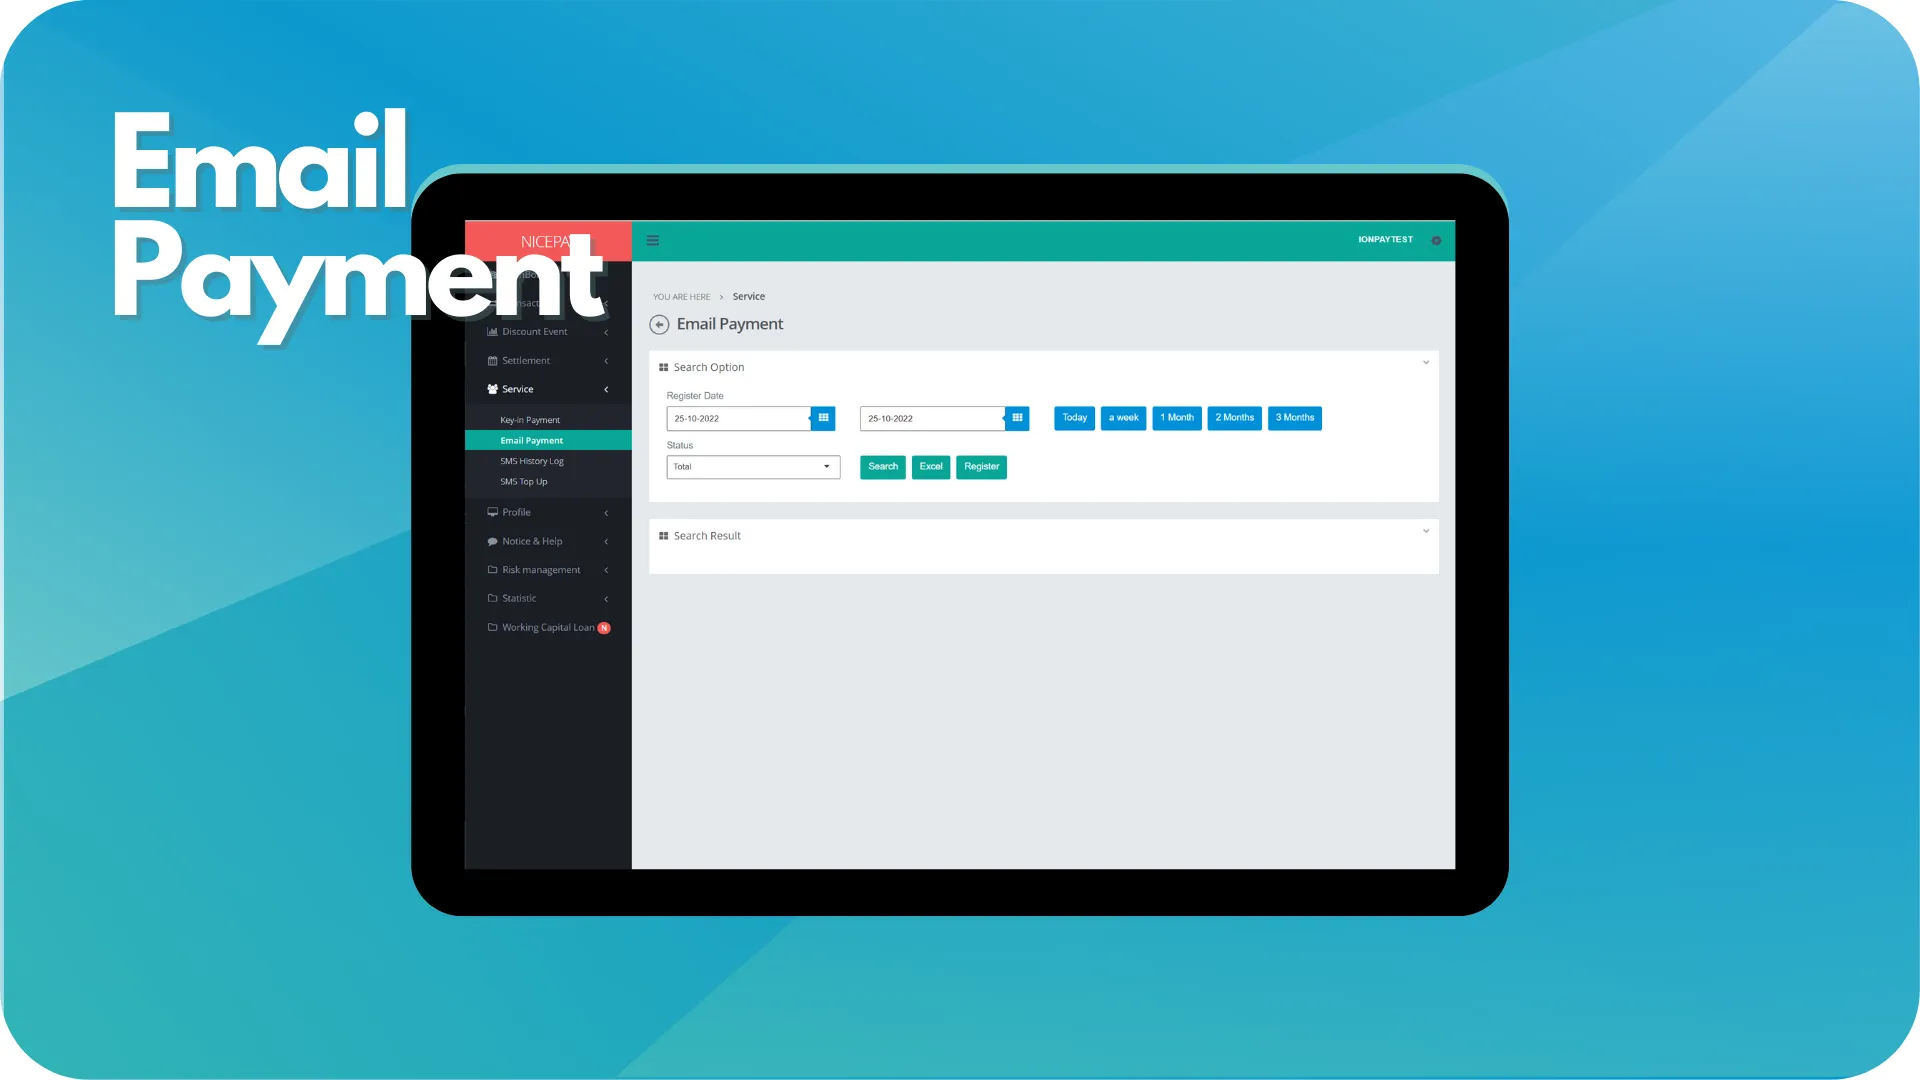
The Email Payment sub-menu uses by Merchant to send invoice that must be paid through the e-mail so Customer can perform the transaction according to the desired payment method. This sub-menu on Back Office MMS assists Merchant to sent the payment information to the Customer through e-mail and view list of transaction process history.
The Email Payment sub-menu page divided into 3 sections; Search Option section , Search Result section, and Regist section. The Search Option section is a form section used to input the search criteria of transaction data. The Search Result section used to displays data search results based on the inputted criteria. The Regist section used to register the Customer payment and proceed the payment using the Payment Link sent via e-mail.
Email Payment
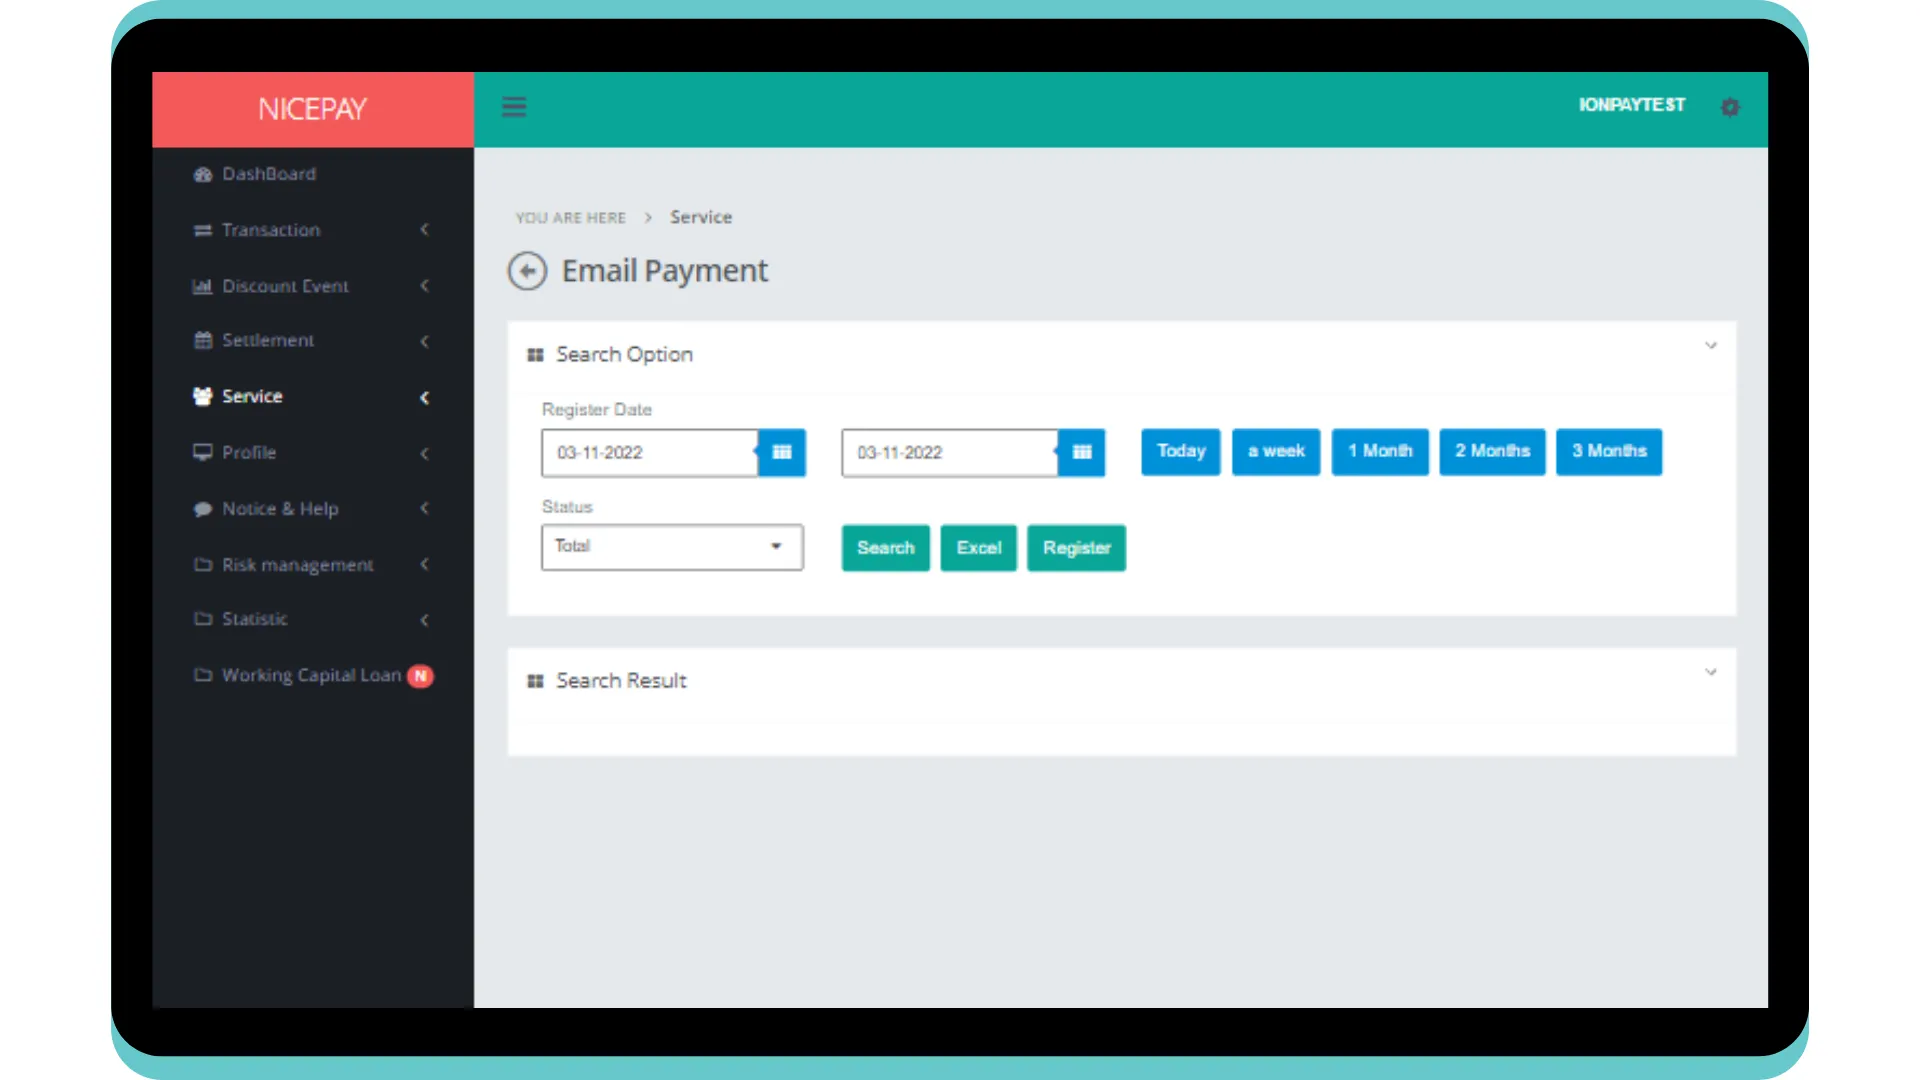
The Search Option section contains the search form that used to search all e-mail payment data. The form consists of:
Name | Description | Remark |
|---|---|---|
Register Date | Registered transaction time period Time settings can be directly determined between today, 1 week, 1 month, 2 months, or 3 months | Default selection: today's date and 24 hour time interval |
Status | Payment status | Default: Total -> all payment status Dropdown option:
|
Search | Button to process the keywords entered by the Merchant to search for data | Data search results will be displayed in the Search Result section |
Excel | Button to process the keywords entered by the Merchant for the file to be downloaded | The file format will be downloaded in Excel format (.XLS) |
Register | Button to display the registration form for the data needs to be paid | Form will appear above the Search Option section |
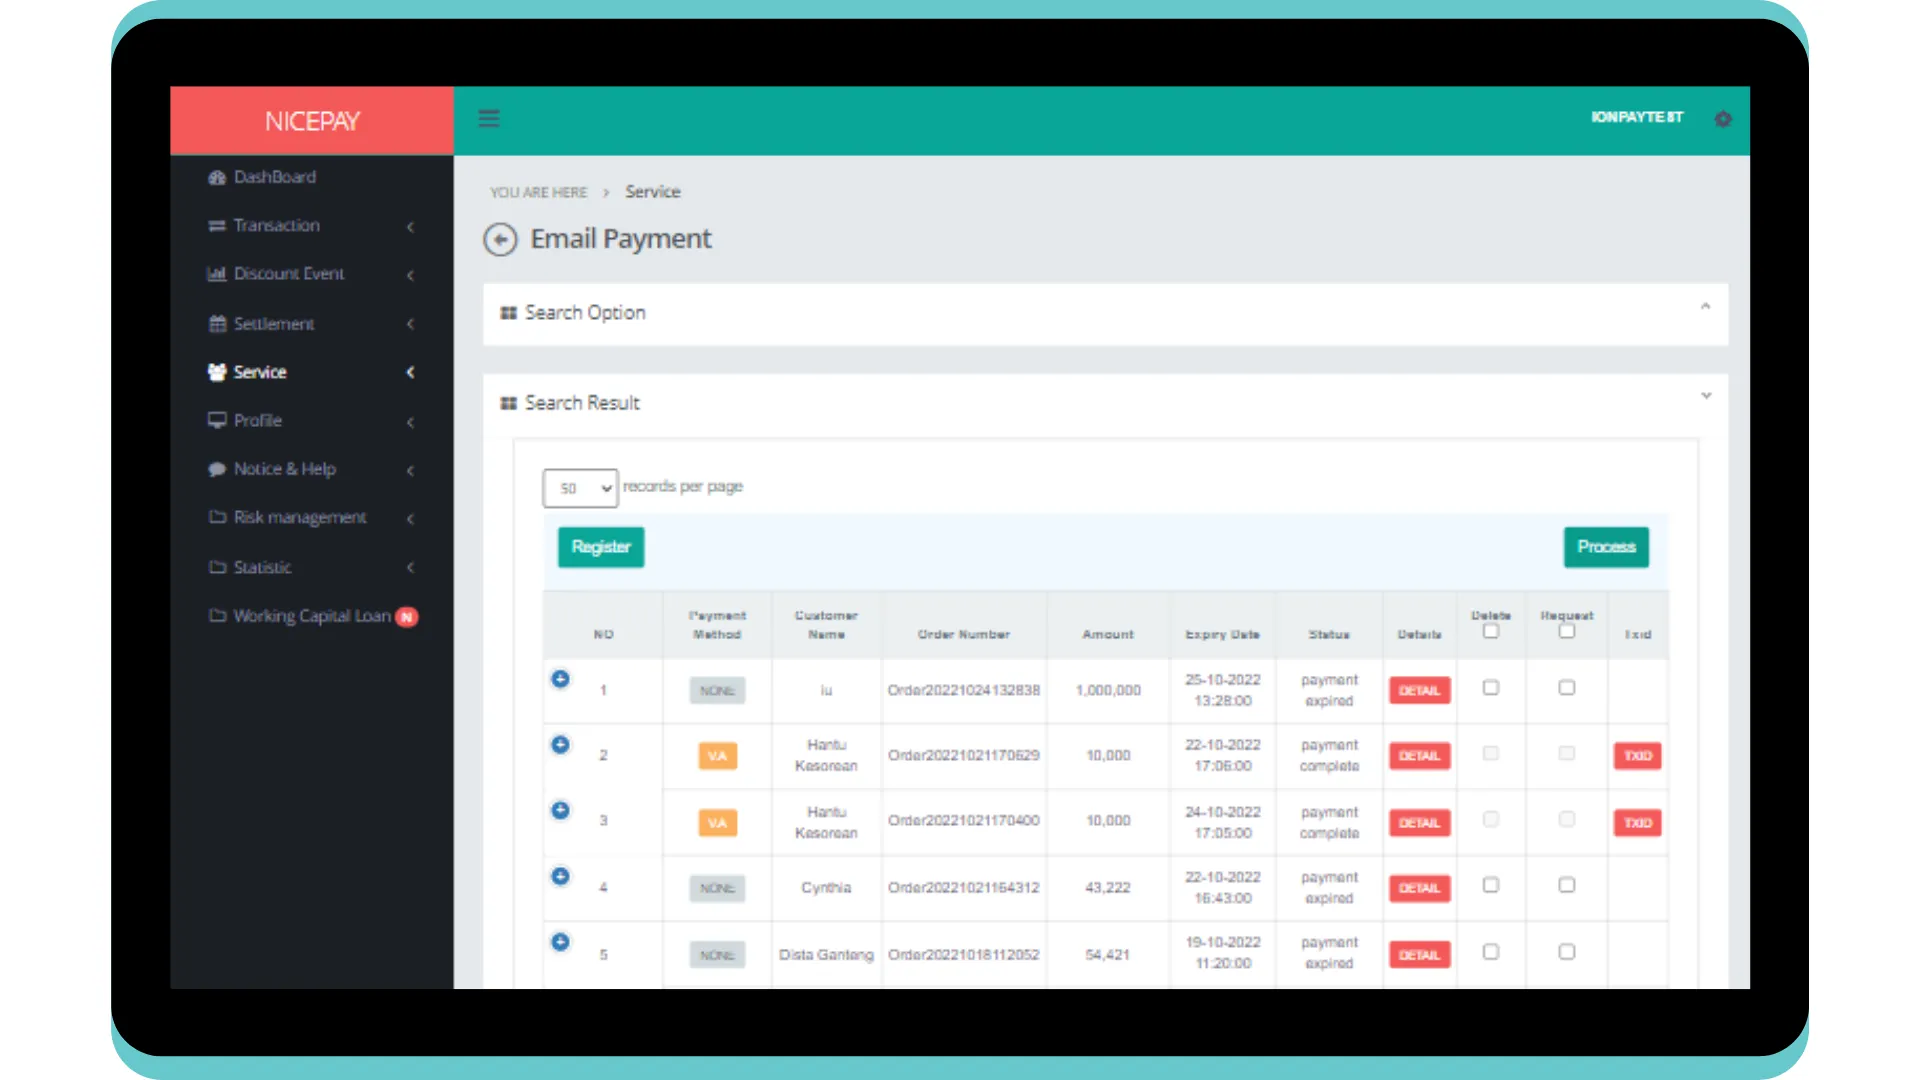
The Search Result section displays data transaction history based on searching results at Search Option section. Data is sorted based on the newest order number until the oldest.
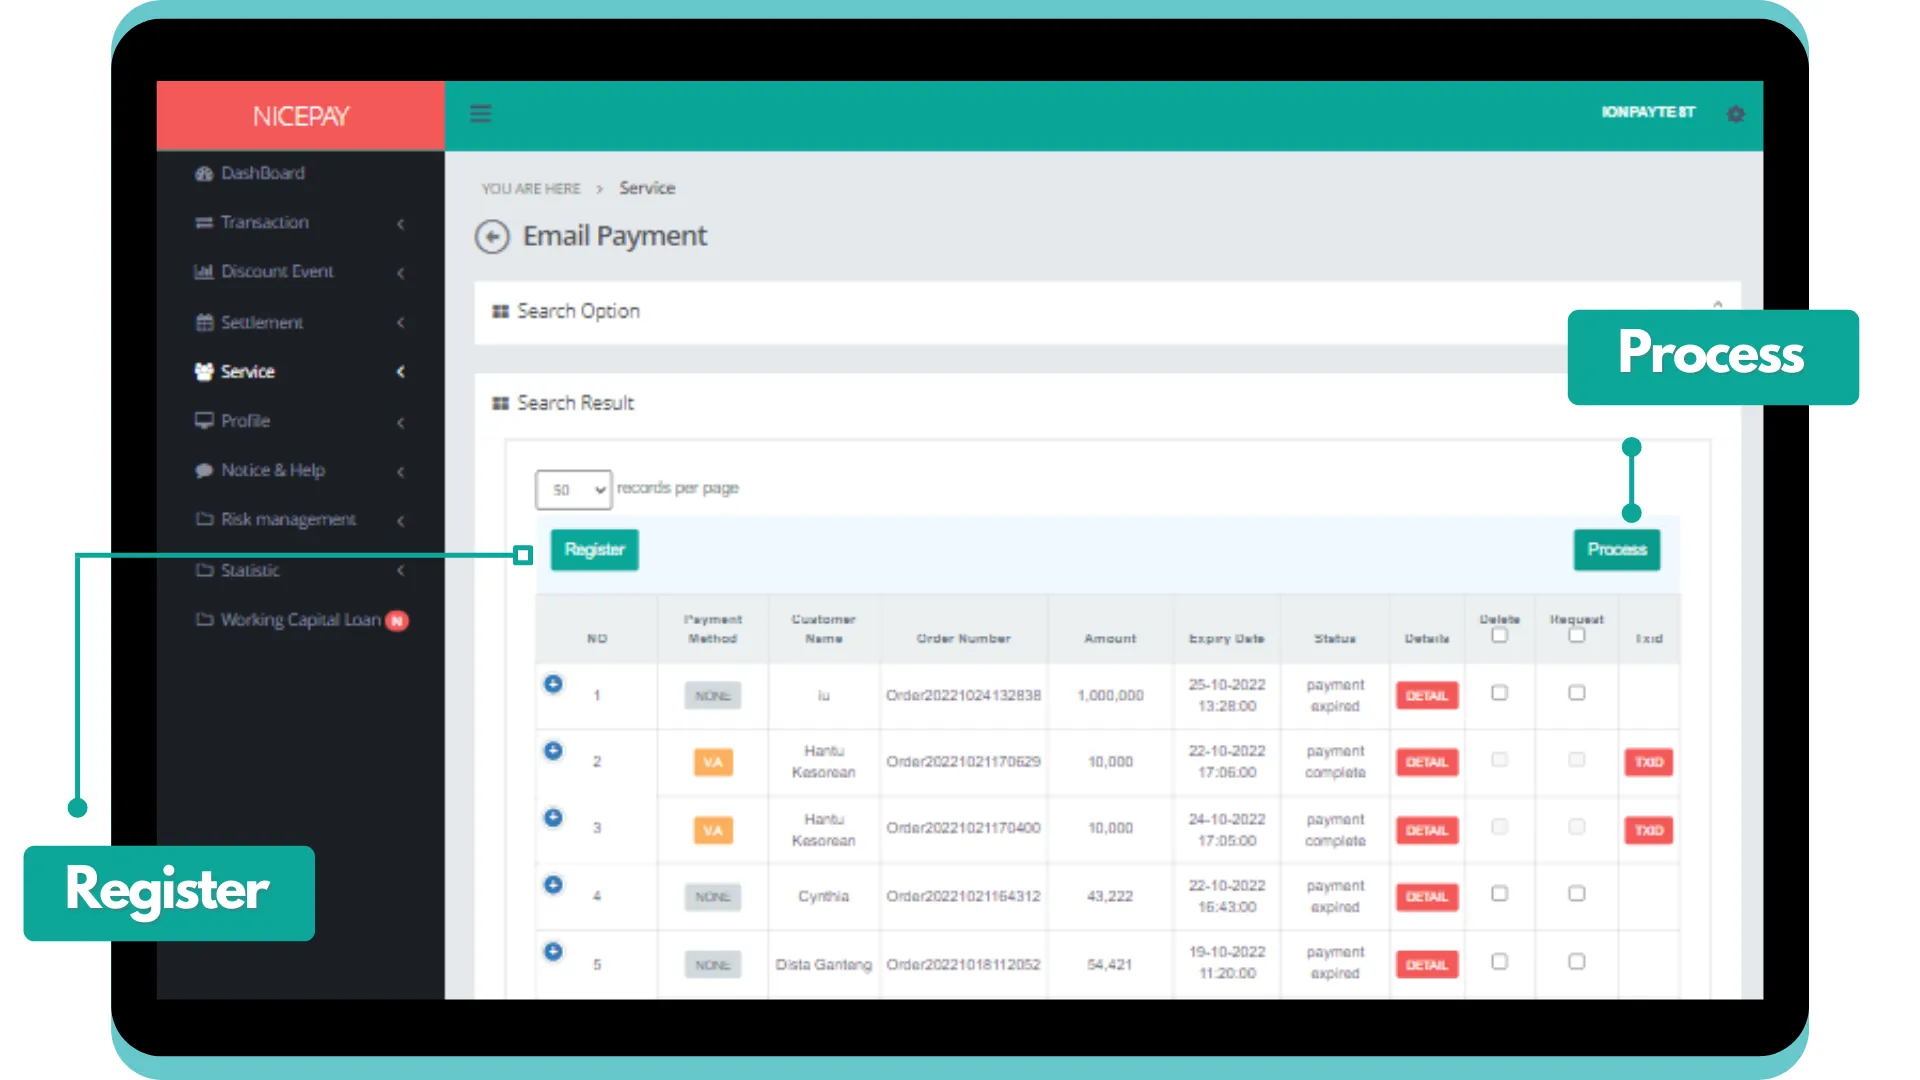
In this section, Admin can add transaction data, delete the transaction, and request TXID. The form in the Search Result section consists of:
Name | Description | Remark |
|---|---|---|
Payment Method | Transaction payment method | |
Customer Name | Customer name | |
Order Number | Order name | |
Amount | Total transaction amount | |
Expiry Date | Transaction valid period Time settings can be directly determined between today, 1 week, 1 month, 2 months, or 3 months | Default selection: today's date and 24 hour time interval |
Status | Transaction status | |
Detail | Transaction detail | |
Delete (checkbox) | To delete transaction | Optional |
Request (checkbox) | To request transaction ID | Optional |
Txid | Transaction ID | Optional TXID button will appear after Merchant request transaction process |
Tutorial
Search Email Payment Data
Here’s guidance for searching transaction data.
- Open sidebar.
- Select the Service menu.
- Select the Email Payment sub-menu
- Input the search term in the Search Option section.
- Press the Search button to perform data searching process.
- The searched data will appear on the Search Result section.
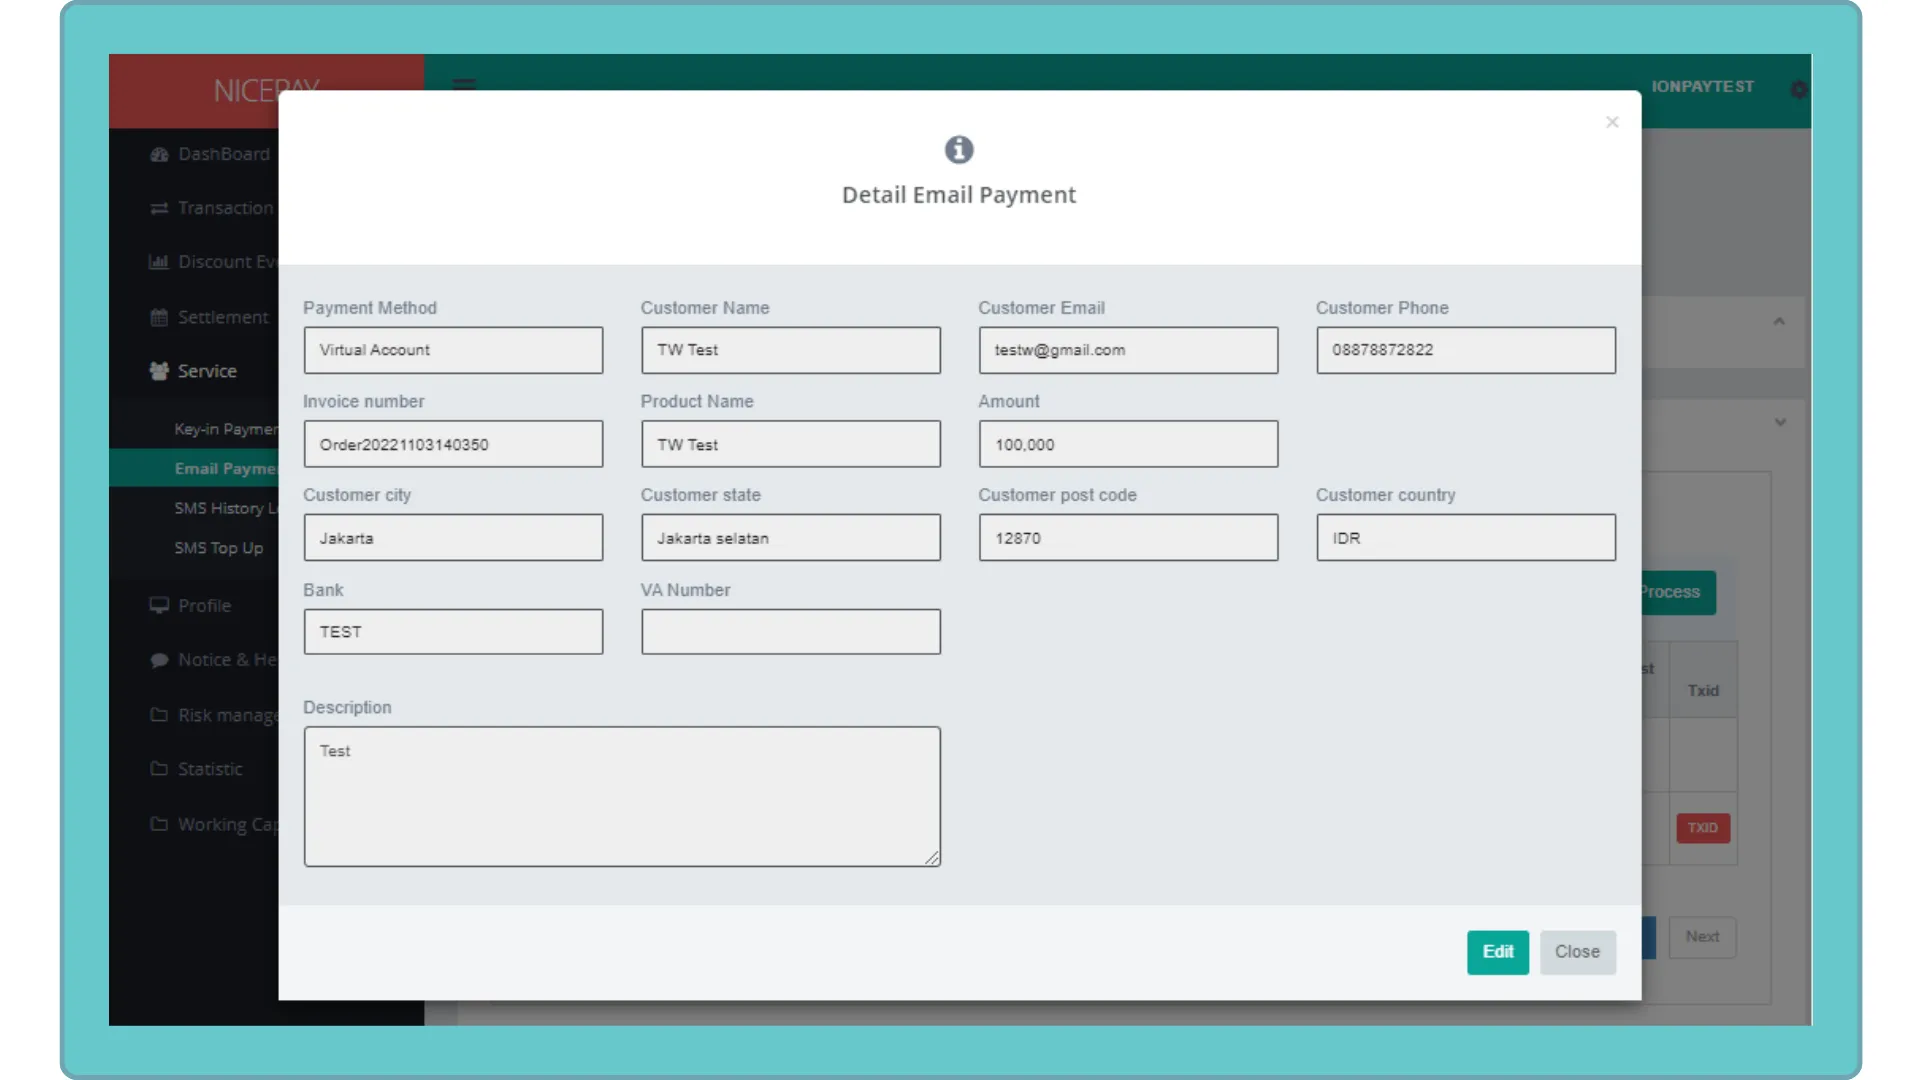
- Press the Detail button to view the detailed information from one of the transaction in the Details column.
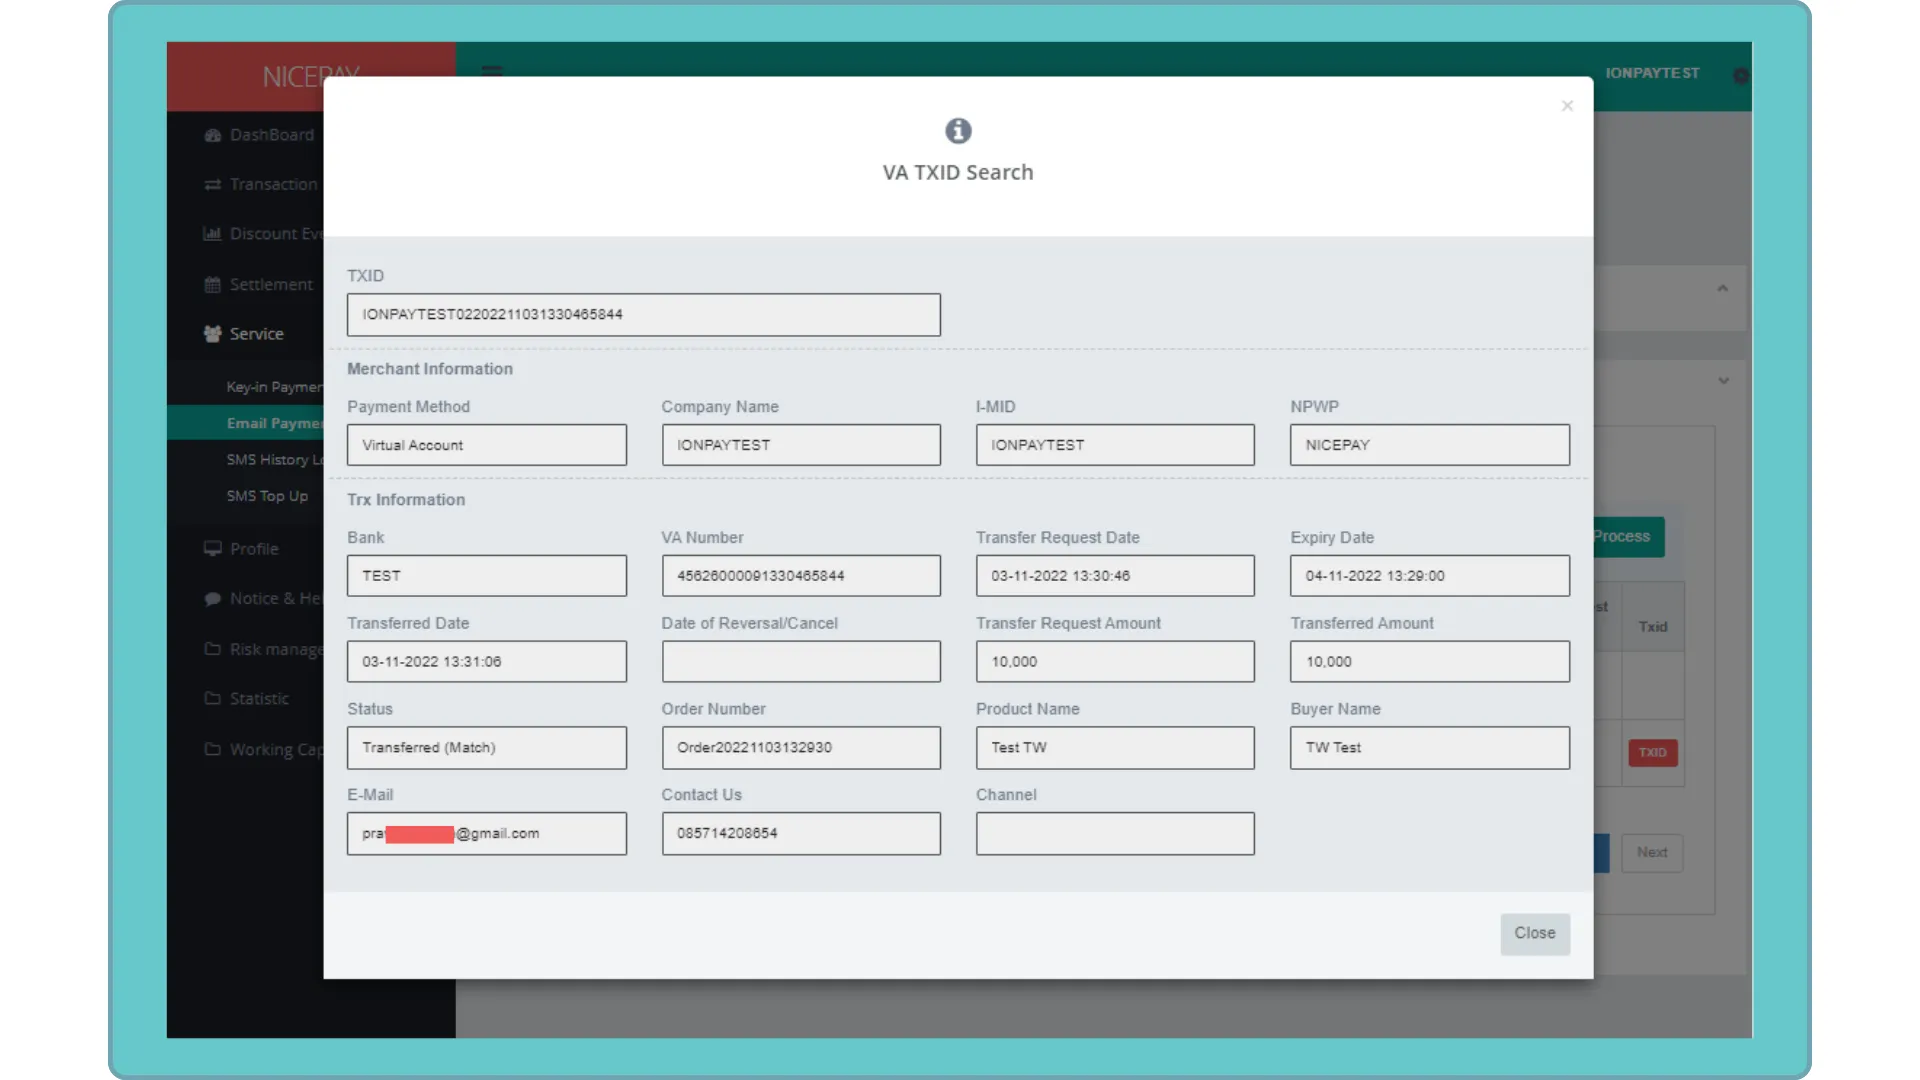
- Press the TXID button on Merchant to view txID number from the button available on the txID column.
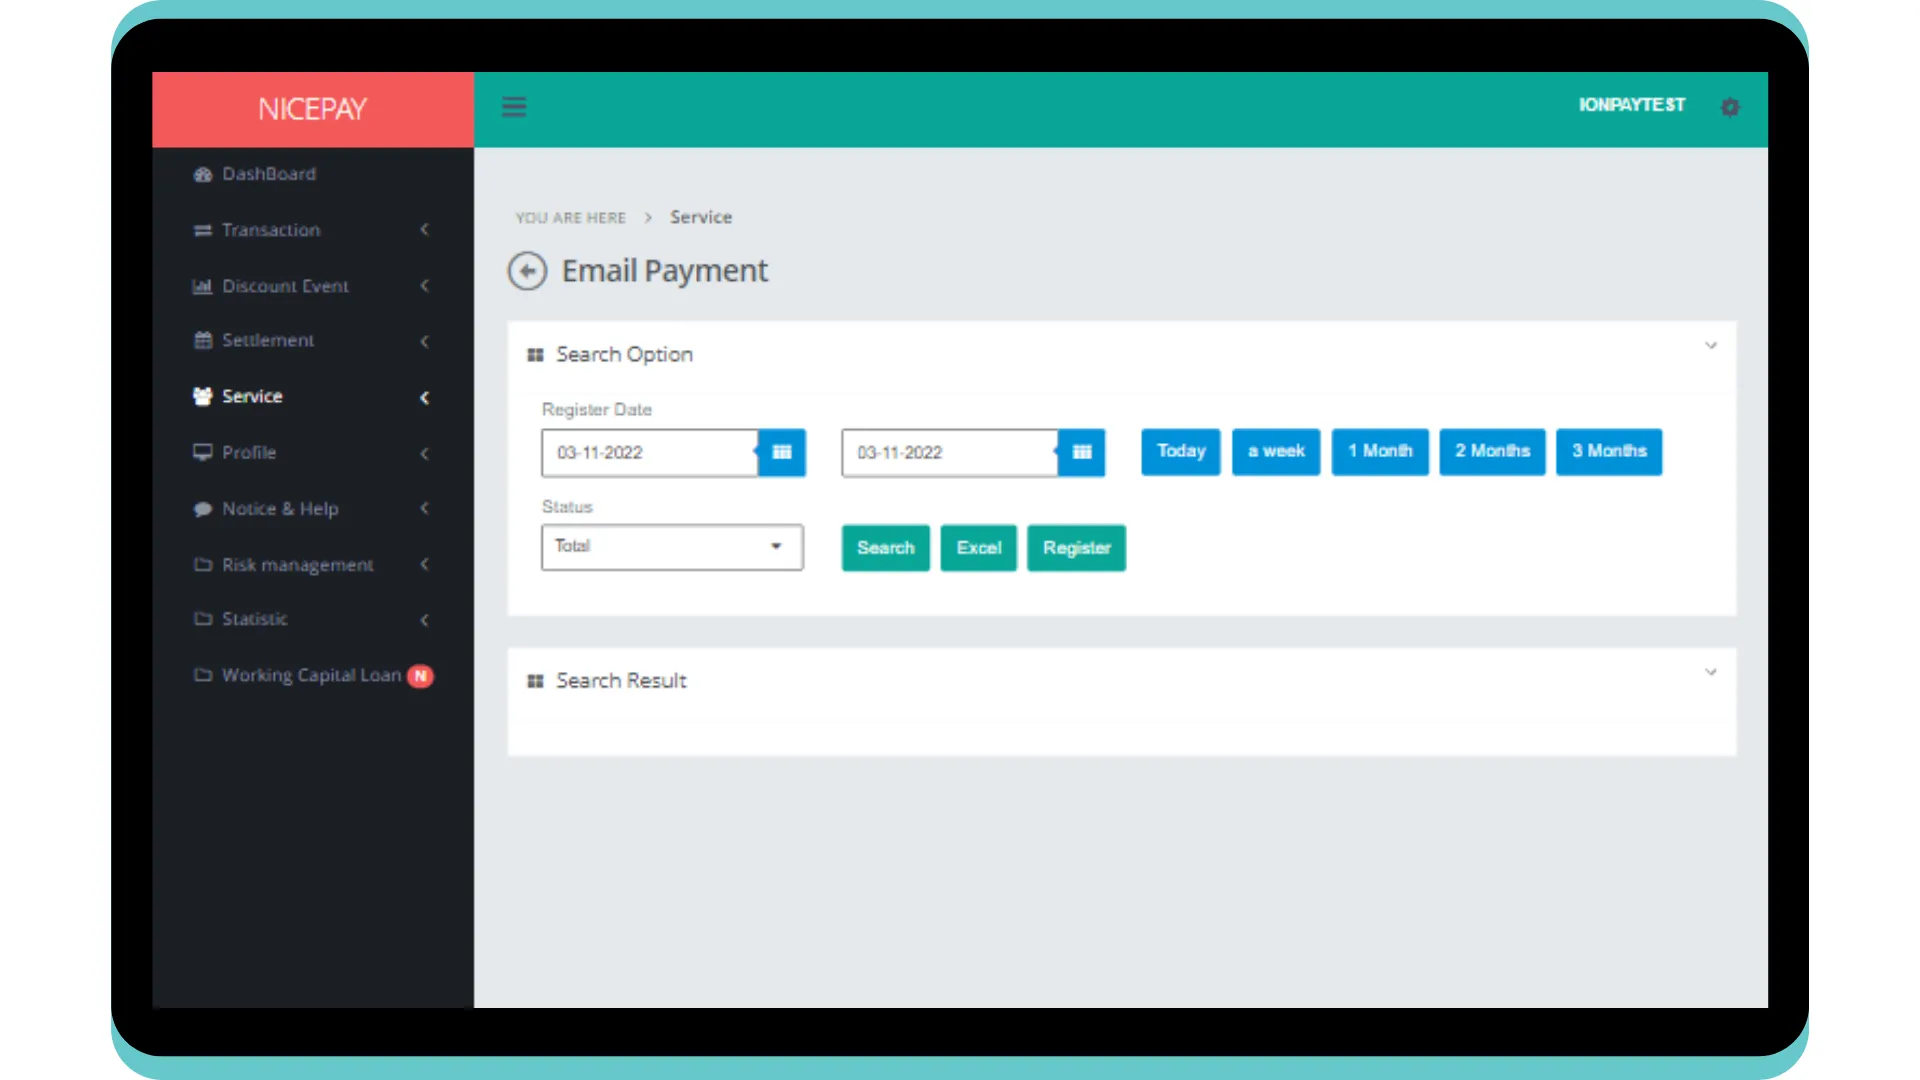
Download Email Payment Data
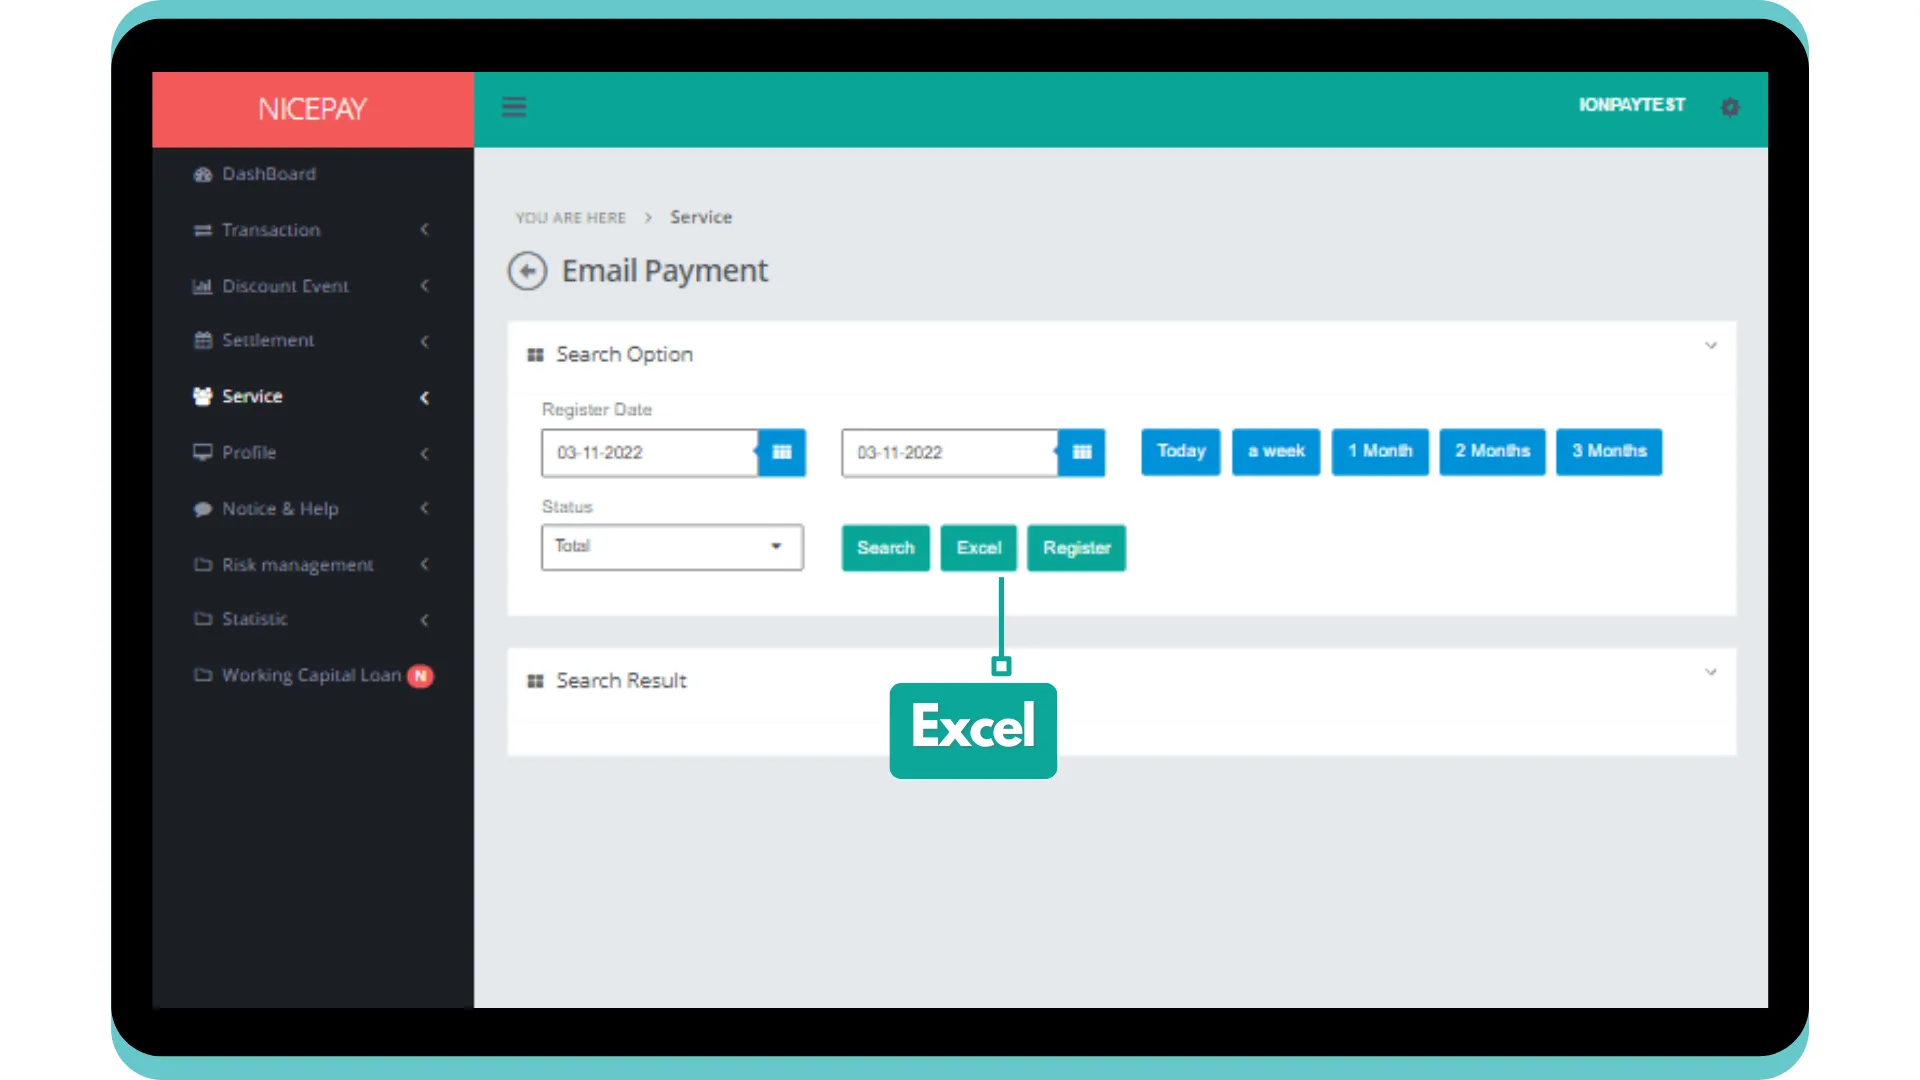
Here’s guidance for downloading transaction data.
- Open sidebar.
- Select the Service menu.
- Select the Email Payment sub-menu.
- Input the search term in the Search Option section.
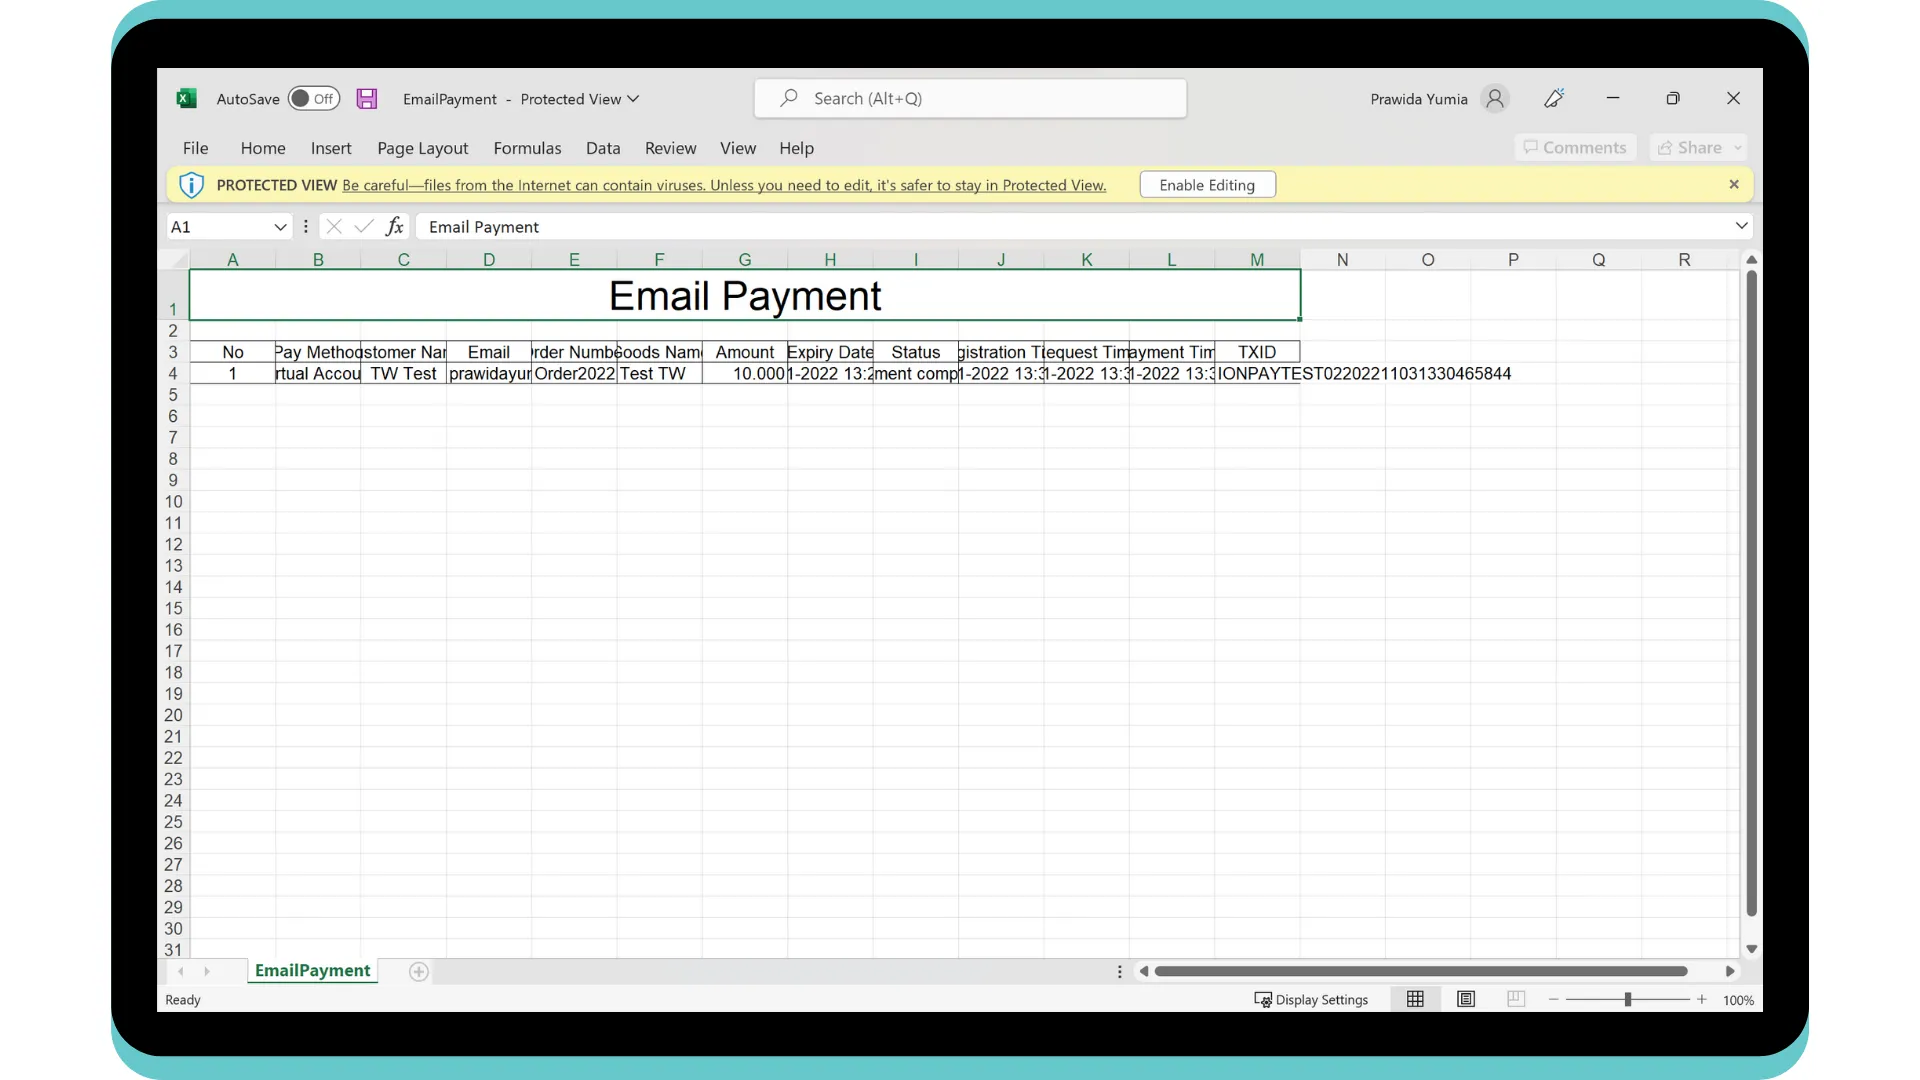
- Press the Excel button to download data in Excel format.
- The searched data will download automatically.
Register Email Payment
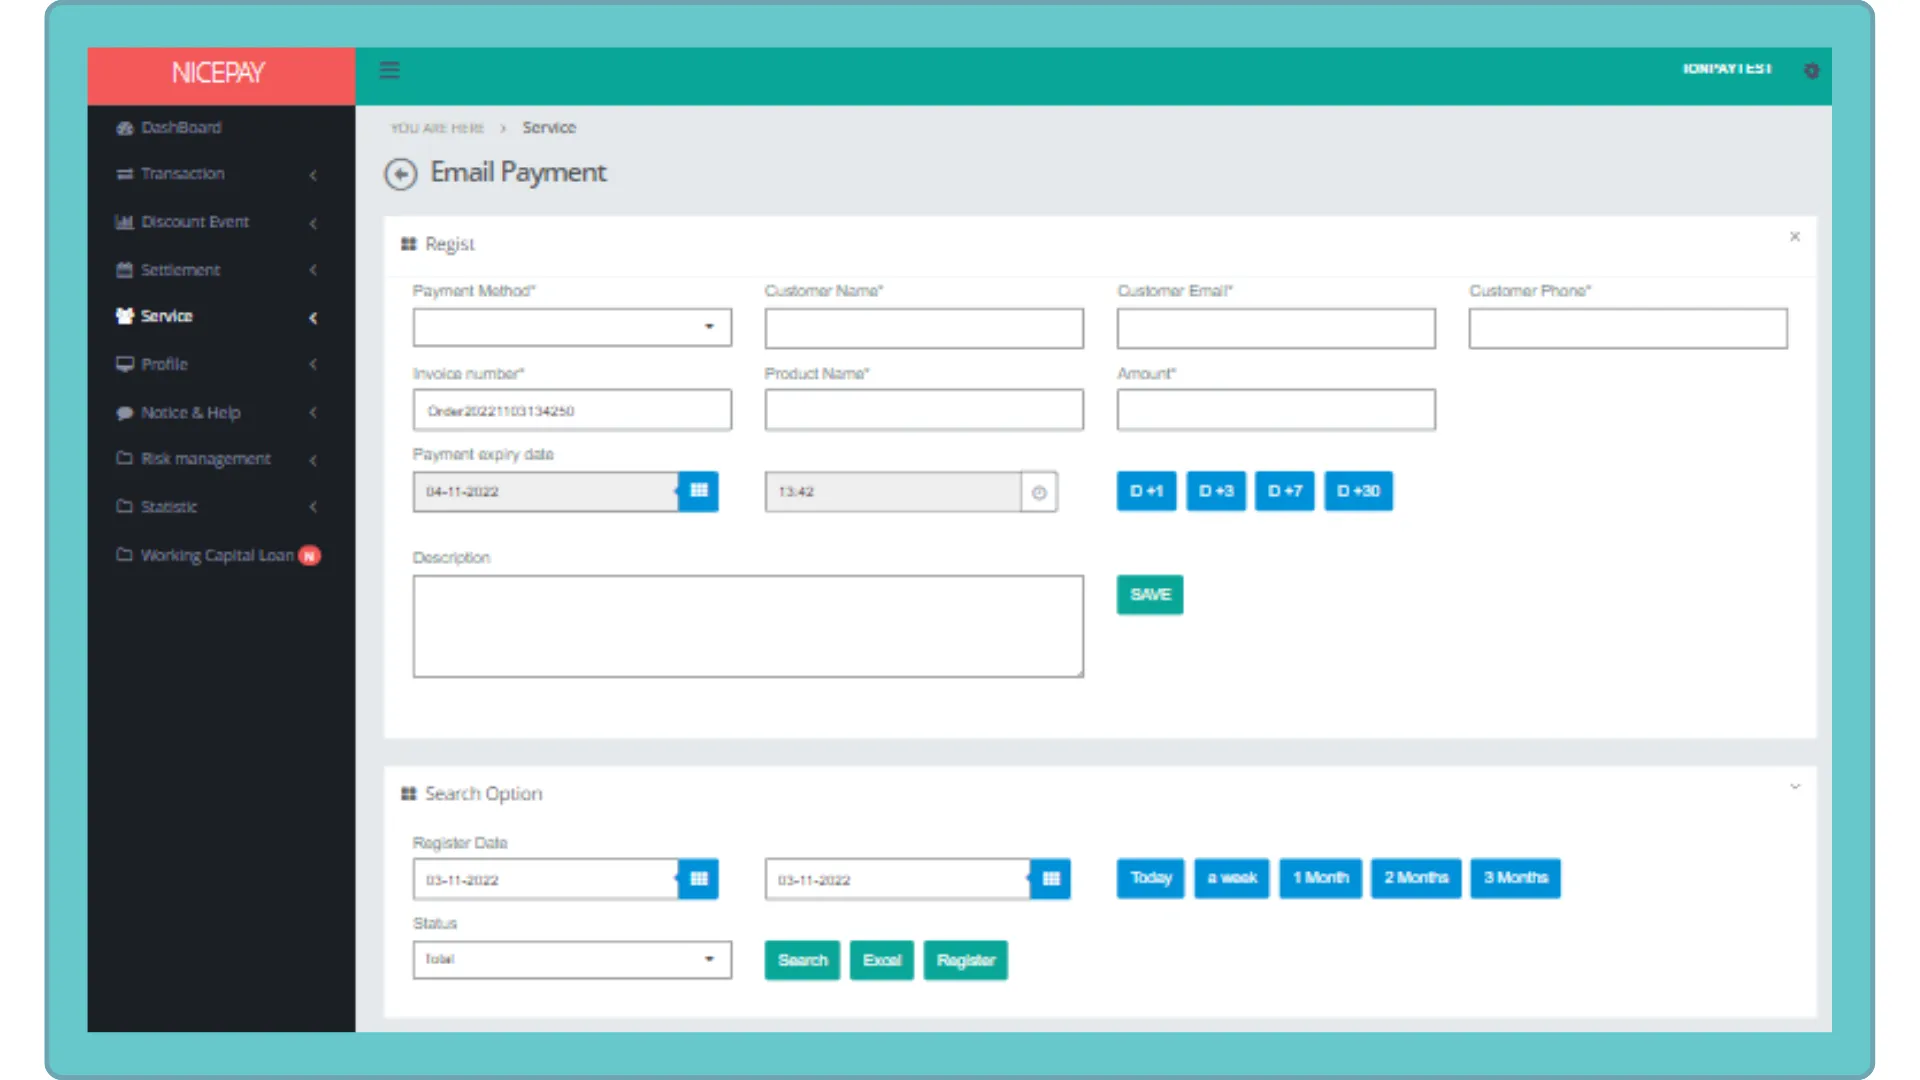
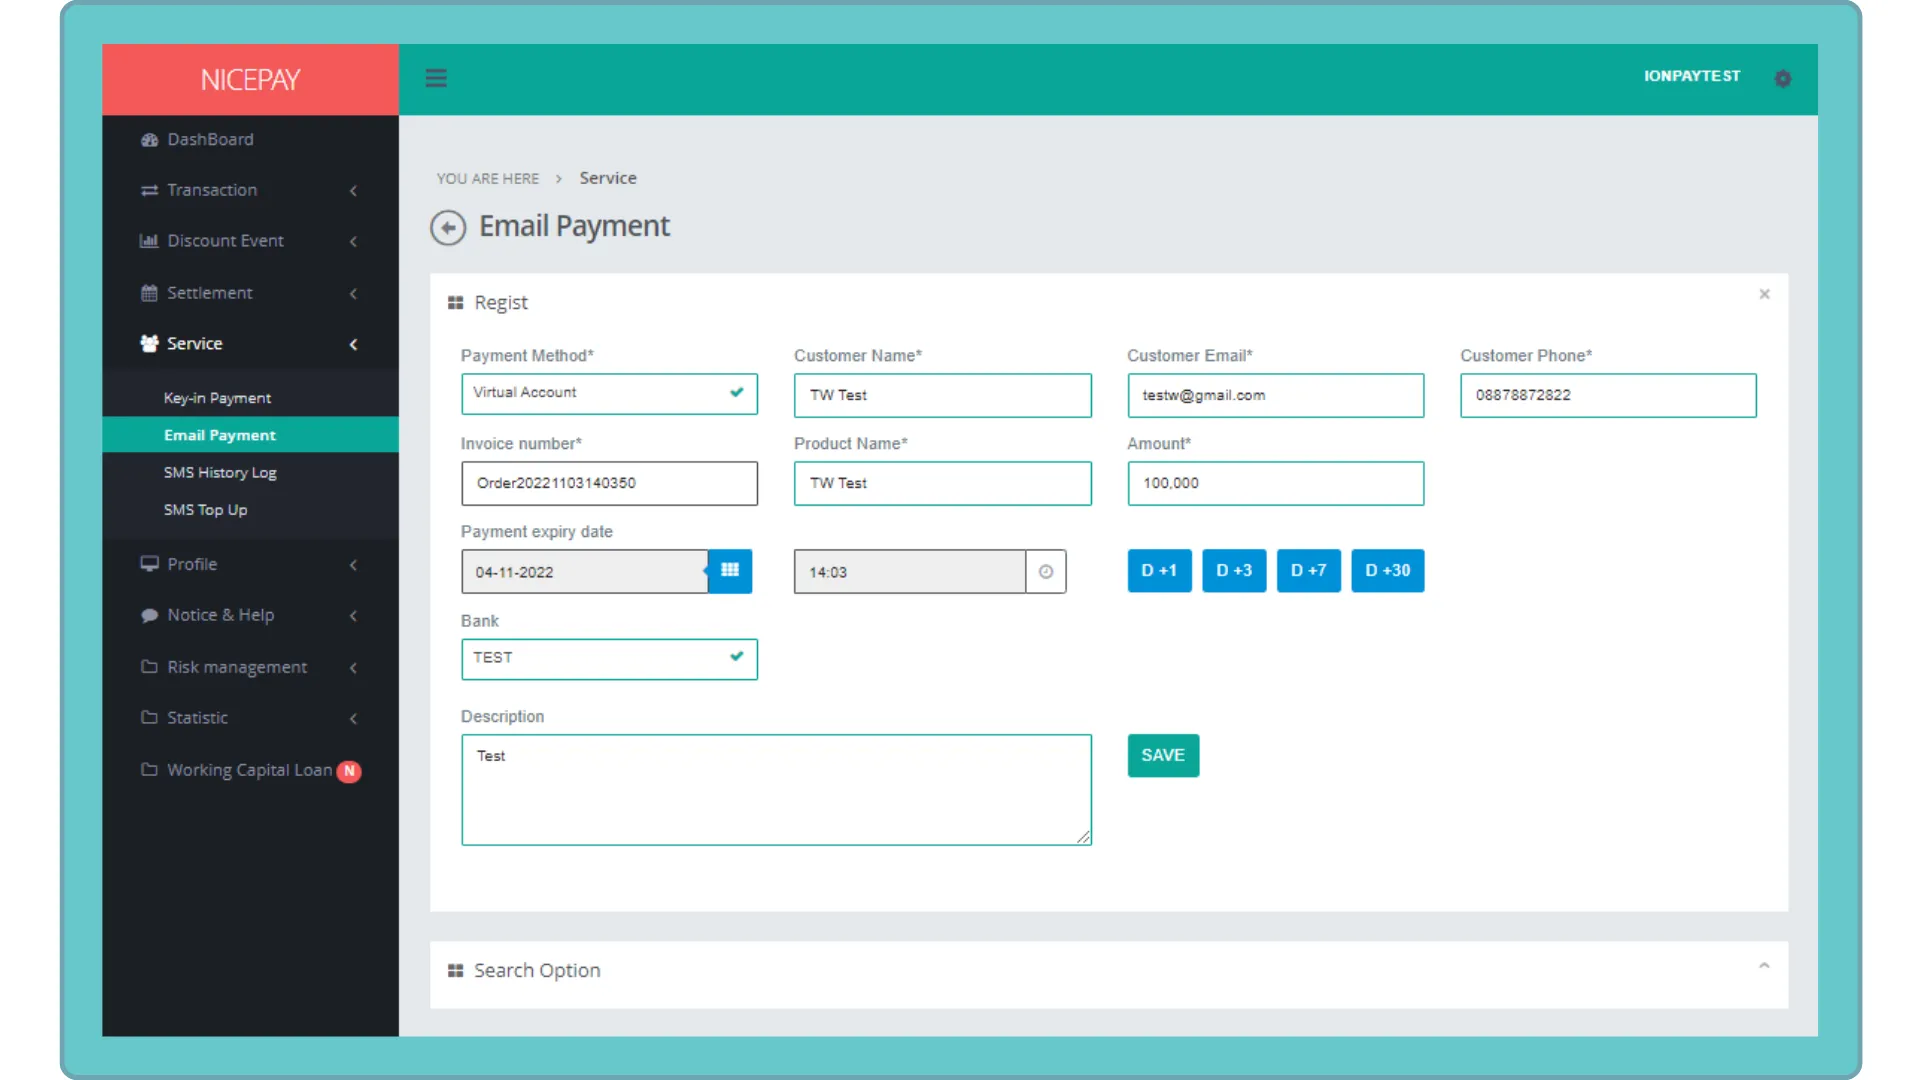
Here's guidance for registering transaction data.
- Open sidebar.
- Select the Service menu.
- Select the Email Payment sub-menu.
- Input data information for registration through the form.
- Select the Register button.
- Recheck the form data on Registration section.
- Click the Save button.
- Data will automatically appear in the table list for transactions with Email Payment as the payment method.
Transaction with Email Payment
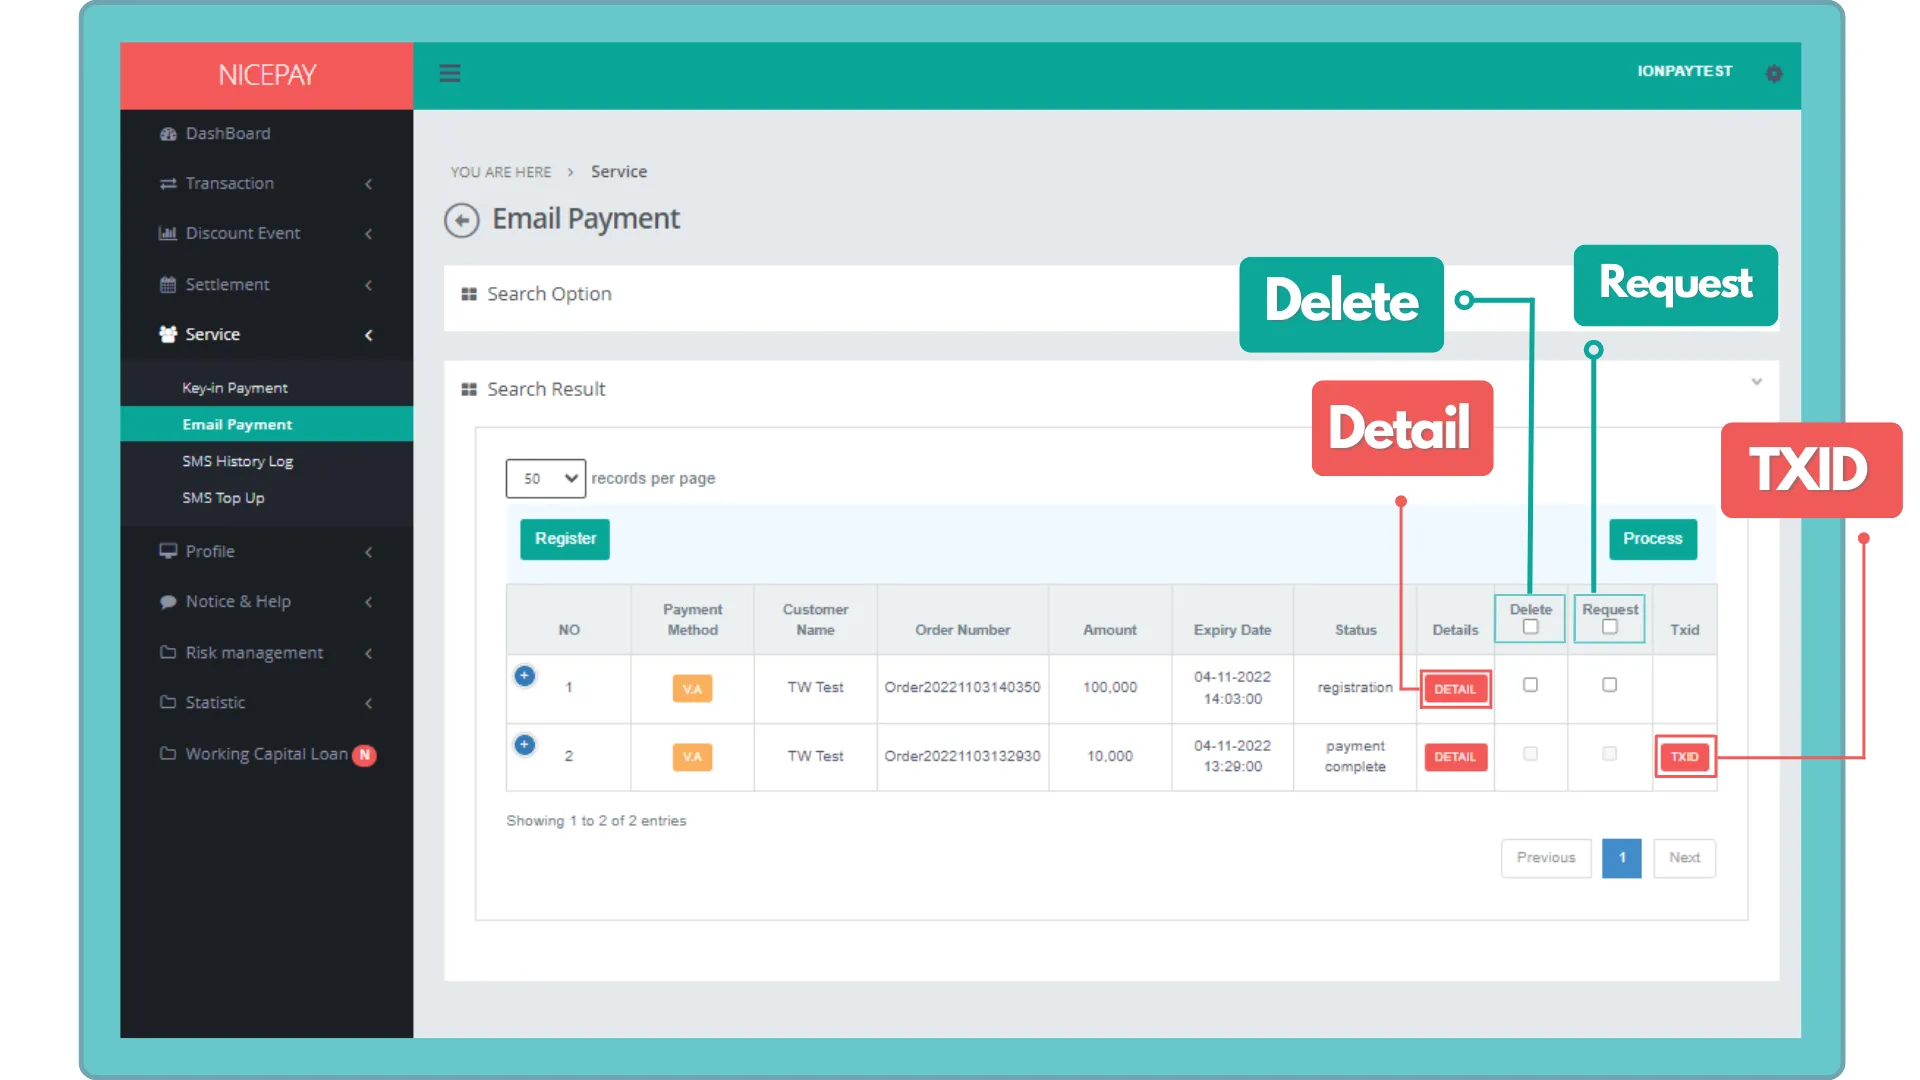
Here’s guidance to perform transaction using Email Payment.
- Open sidebar.
- Select the Service menu.
- Select the Email Payment sub-menu.
- Input the data criteria that will be proceeded.
- Click the Search button.
- The email payment transaction table containing registered data will show in the Search Option section.
- Checklist the Request box on the payment wish to proceed. The Request executes to generate transaction ID (TXID) so payment can be processed.
- Click the Process button to proceed generate transaction ID.
- Data that already went through the request process will get the transaction ID as it generates the result. It is shown with the appearance of the TXID button on TXID column.
- Click the Detail button to view the completer information or click the TXID button to view the completer information based on the transaction ID.
Transaction list table using the Email Payment.
Delete Email Payment Data
Here’s guidance to delete the transaction data.
- Open sidebar.
- Select the Service menu.
- Select the Email Payment sub-menu.
- Input data criteria that want to be proceed.
- Click the Search button.
- The email payment transaction table containing registered data will show in the Search Option section.
- Checklist the Delete box on the payment that want to be deleted.
- Click the Process button to proceed the data deletion process.
- Data will remove from the table in the Search Result section.
See also
Find out explanation related to NICEPAY payment product on Payment Link page.
Visit the Key-in Payment page to find out how to proceed payment using Merchant Back Office.